

Smart Control for Clean Water and Lower Energy Bills
Pool maintenance doesn’t have to be expensive or time-consuming. One of the biggest power consumers in any pool setup is the pump. While it’s essential to circulate water and distribute chemicals, many people run their pumps longer than necessary, especially on cooler days. Because the filter requirement is dependent on the temperature – the higher it is, the more filtration and circulation is needed.
So, instead of setting a fixed runtime, I use this rule of thumb:
Run the pool pump for half of the maximum daily temperature (in °C) in hours.
For example:
- On a 30°C day → 15 hours of runtime
- On a 21°C day → 10.5 hours of runtime
- On a 15°C day → 7.5 hours is enough
This strikes a great balance between hygiene and efficiency: on hotter days, you prevent algae and bacterial growth; on cooler days, you save electricity without compromising cleanliness.
I’ve automated this using Home Assistant with a few template sensors and a single automation. Let’s break it all down.
Step 1: Perquisites
I use two helper variables and one integration in the below integration. Make sure they are available in your Home Assistant instance as well:
- 🗓 A Schedule helper named
poolpump_schedule, defining the latest end time. The end time is used as the fixed daily shutdown point. - 🔘 An Input Boolean called
input_boolean.poolpump_automationto manually enable or disable the automation. - 🌡 A weather integration that provides today’s maximum temperature. I use AccuWeather, which exposes
sensor.home_realfeel_temperature_max_0d. - 🎚️ An Input Number helper called
input_number.poolpump_multiplier, which lets you adjust the multiplier (e.g. 0.5 = half or 0.3 = one third).
Step 2: Create a Sensor to Calculate Pump Runtime
This sensor calculates the number of hours the pump should run today, based on the max temperature and the multiplier — but it will never exceed the number of hours available before the scheduled stop time or 23 hours.
This code must be entered into the configuration.yaml file of your HomeAssistant instance. I use the add-on “file editor” to access and edit the configuration.yaml file.
template:
  - sensor:
      - name: PoolMaxTemp
        unique_id: pool_max_temp
        unit_of_measurement: "h"
        icon: mdi:water-pump
        state: >-
          {% set multiplier = states('input_number.input_number_poolpump_multiplier') | float(0.3) %}
          {% set max_temp = states('sensor.maximale_temperatur_heute') | float(0) %}
          {% set raw_runtime = max_temp * multiplier %}
{{ [raw_runtime, 23] | min | round(0) }}What it does:
- Input:
sensor.home_realfeel_temperature_max_0d– this should be your weather integration’s forecast for today’s maximum temperature. - Logic: We multiply that value with the multiplier (input_number.poolpump_multiplier) to get the desired number of hours the pump should run. If you want your pump to run longer or shorter (depending on pool size, climate, sun, filter and chemicals) adjust the value of that helper in a slider accordingly (the larger the number, the longer the pump runs each day)
- Output: A rounded integer value (e.g., 10 for a 30.2°C forecast with a 0.5 multiplier).
- The calculated runtime is also capped so it never exceeds the schedule duration or 24 hours, preventing invalid start times.
Step 3: Get the Schedule End Time
This helper reads the next scheduled stop time from the schedule helper (if available) and exposes it as a sensor for use in the following templates.
This sensor also gets added to the configuration.yaml:
template:
  - sensor:
      - name: Next Stop Time
        unique_id: next_stop_time
        icon: mdi:clock-end
        state: >-
          {% set next_event = state_attr('schedule.poolpump_schedule', 'next_event') %}
          {% if next_event is not none %}
            {{ next_event }}
          {% else %}
            unavailable
{% endif %}What it does:
It reads the next scheduled end time from the schedule helper. You can also use this sensor to display the pump’s next stop time in your dashboard.
Note: This template relies on the schedule helper exposing the
next_eventattribute. If your installation does not provide it, you can replace this helper with any sensor that exposes the next scheduled stop time.
Step 4: Calculate Pump Start Time
This allows the schedule helper to always define the desired stop time while the start time is calculated dynamically from the required runtime.
      - name: PumpStartTime
        unique_id: pump_start_time
        icon: mdi:clock-start
        state: >-
          {% set runtime = states('sensor.poolmaxtemp') | float(0) %}
          {% set stop_ts = as_timestamp(states('sensor.next_stop_time'), none) %}
          {% if stop_ts is not none %}
            {{ (stop_ts - runtime * 3600) | timestamp_custom('%H:%M', true) }}
          {% else %}
            unavailable
{% endif %}What it does:
- It takes the schedule end time, subtracts the required running duration and then holds the required start time. This time can be displayed in your dashboard and it will be used as trigger for the automation to start the pump.
Step 5: Automation
Now let’s do the automation that does the behind the scenes magic. Starting with the header of the automation, the triggers and conditions. To use this, simply open a new automation, switch to YAML mode and paste this code:
alias: Poolpumpe
description: >-
  Schaltet die Poolpumpe zur berechneten Startzeit ein und am Ende des
  Zeitplans wieder aus.
mode: single

triggers:
  - trigger: time
    at: sensor.pumpstarttime
    id: "on"
    alias: Startet zur berechneten Startzeit

  - trigger: state
    entity_id: schedule.poolpump_schedule
    from: "on"
    to: "off"
    id: "off"
    alias: Schaltet aus wenn Zeitplan endet

  - trigger: homeassistant
    event: start
    id: startup
    alias: Prüft beim HA-Start ob Pumpe laufen sollte

conditions:
  - condition: state
    entity_id: input_boolean.poolpump_automation
state: "on"What it does:
- The automation triggers as soon as the poolpump schedule turns from ON to OFF. We use this trigger (which we gave the ID “off”) to switch off the pool pump as soon as the schedule ends.
- The second trigger with the ID “on” triggers at the calculated start time.
- The third trigger ensures that we have the right state when home assistant starts – making sure the pump never runs when it shouldn’t and puts a peace of mind to updates of home assistant.
- We only want this automation to trigger if the poolpump_automation switch is turned on.
Now the actions section of the automation. Copy that below the first part on line 17:
actions:
  - choose:
      - alias: Normal einschalten
        conditions:
          - condition: trigger
            id: "on"
          - condition: state
            entity_id: schedule.poolpump_schedule
            state: "on"
        sequence:
          - action: switch.turn_on
            target:
              entity_id: switch.poolpumpe

      - alias: Nach Neustart einschalten, falls Pumpe laufen sollte
        conditions:
          - condition: trigger
            id: startup
          - condition: state
            entity_id: schedule.poolpump_schedule
            state: "on"
          - condition: template
            value_template: >-
              {% set start = states('sensor.pumpstarttime') %}
              {% set stop_ts = as_timestamp(states('sensor.next_stop_time'), none) %}
              {% set now_ts = now().timestamp() %}
              {% set start_ts = as_timestamp(now().strftime('%Y-%m-%d') ~ 'T' ~ start ~ ':00', none) %}
              {% if start_ts is not none and stop_ts is not none %}
                {{ start_ts <= now_ts <= stop_ts }}
              {% else %}
                false
              {% endif %}
        sequence:
          - action: switch.turn_on
            target:
              entity_id: switch.poolpumpe

      - alias: Normal ausschalten
        conditions:
          - condition: trigger
            id: "off"
        sequence:
          - action: switch.turn_off
            target:
entity_id: switch.poolpumpeWhat it does:
- This part of the automation contains two separate sequence parts: one for switching the pump on, and one for off. We distinguish this by using the trigger IDs (“on” and “off” we defined in the automation triggers section earlier.
- When turning the pump to on we have to check if it is already time to turn it on! Because, due to how we setup the automation, this is triggered every hour. We do this using a template and the value of PumpStartTime. We compare the current time with PumpStartTime. If the time matches the pump turns on.
- Secondly, if the trigger is “off” then we turn the pump off.
Final Thoughts
The result is a fully dynamic pump schedule that automatically adapts to the daily weather forecast while always finishing at your preferred time. After the initial setup, no manual adjustment is required apart from changing the multiplier if your pool or filter system requires longer or shorter runtimes.
By combining weather-based logic and time-restricted control, you create an intelligent pump automation that:
- Saves energy
- Adapts to daily conditions
- Runs during the warmest part of the day and the period you are most likely to use the pool
- Requires zero manual input once set up but can be designed to usage patterns and individual preferences without coding.
If you’re ready to go even further, you can:
- Notify yourself when the pump is running
- Display start and stop times in a dashboard card for monitoring
- Get creative when adding the pump-switch, the poolpump_automation switch and the poolpump_multiplier to your dashboard.
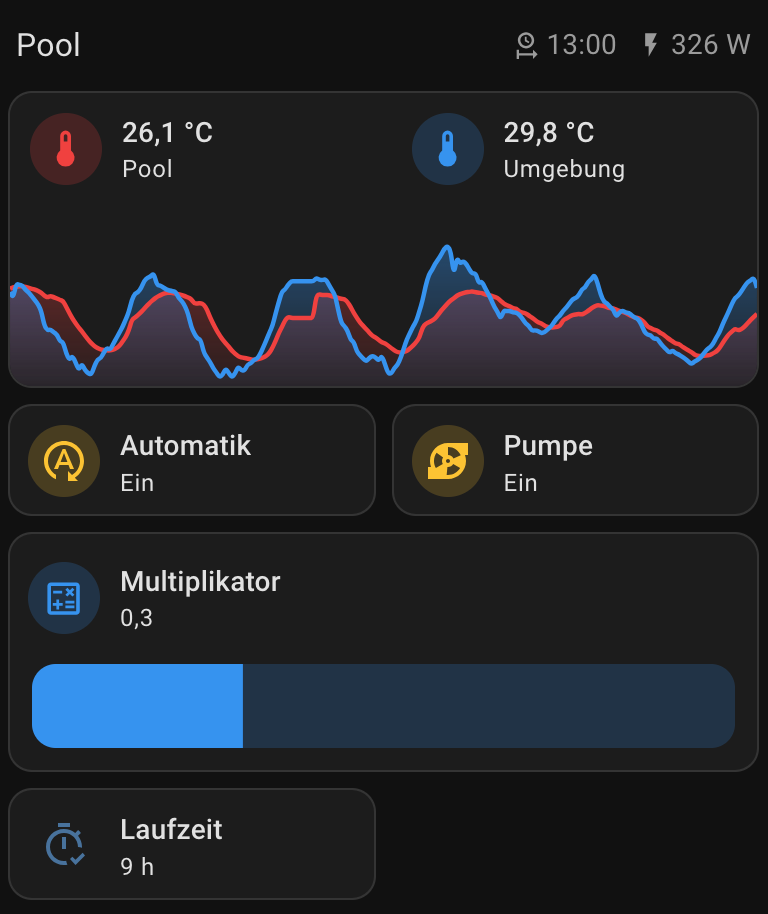
To give you an impression of how I visualize this on my dashboard, here is my pool section (including the pool temperature and the power the pump uses)







Hi Peter,
Thanks for sharing your codes, highly appreciated. I got it to work 😉 (as I’m not a coder) just changed from air temperature to pool water temperature, which makes more sense for me. Is there any chance to implement a dynamic start time? Currently it’s calculated back from the end time. Just to give you an example why: For instance you get a run time of 6 hours and the defined end time is 7 pm. The pump would start at 1 pm. I think, it would be better to run the pump during the hot time, from 10 to 4. A dynamic start time would always start not later than 10:00 am but if needed earlier.
Just my thoughts.
Thanks, Otto
Sorry one more 😉 … any plans to implement photovoltaic / batterie / sunshine in your code?
Hi Otto,
thank you for your comment and valuable additions! Indeed running the pump during the hottest period of day would be beneficial. I will think about adding a latest start time – as you suggested.
And the second comment: in deed I was thinking about this as well as one of the next improvements! I already have photovoltaic on my roof but I sell all electricity right away (no storage or self-consumption at the moment). But I plan on buying a so called “balkonkraftwerk” early this year to also cope with the electricity demands of the pump. I already use a predictive model for electricity generation … so that should be possible to integrate. Give me a few weeks though